Pages

Tuesday, April 9, 2013

What Do Writers Write?

As a second grade teacher, I'm always on the lookout for great anchor charts that I can hang in my room to remind students of expectations and strategies for reading, writing, math, and science.  Cara Carroll has so many great ideas on her site, like this one:

The First Grade Parade: Writer's Workshop Anchor Charts

I originally saw the "What Do Writers Write?" anchor chart on pinterest, and decided it would be the perfect thing to hang above my writing center (which really.... is just a giant set of mailboxes filled with different types of writing papers).

Since I didn't have any posterboard at my house, I just taped two pieces of white cardstock together and went from there!  This is the final product, hanging in my classroom:


Thank you Cara Carroll for the great idea!

Sunday, April 7, 2013

Front Yard Mulch Bed

This weekend was the first sunny, warm weekend we've had in quite a while.  Today Steven and I decided to take advantage of the great weather to spruce up a bed in the front yard.

BEFORE:  Overgrown, messy, weed-infested bed.  This was even after Steven started to rake out some of the weeds.


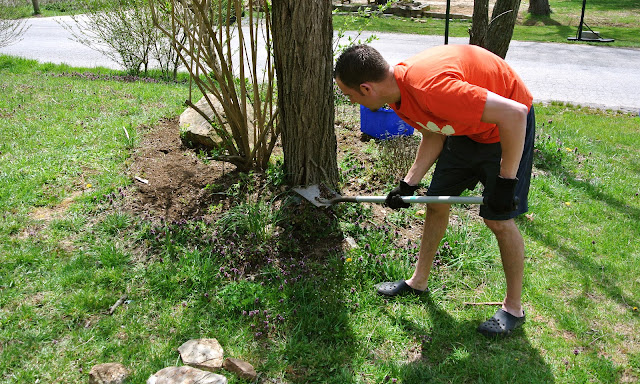
First we used a metal rake and a shovel to pull out as much grass and as many weeds as we could.  We used an empty recycling bin to cart the debris to a corner of the backyard.


Once most of the weeds were out, we rolled out landscaping fabric to cover the dirt.


We used metal landscape fabric pins to hold down the edges.


It took a lot more fabric than we expected...


Then we spread black mulch over the fabric.  This little area took 7 bags of mulch.  There were some stones left over from our walkway project that we used to outline part of the mulch bed.  We'll have to pick up some more to go all the way around, but it looks so much better than it used to!


AFTER: "Lush, black, smell-good mulch now covers the bed." (Steven)

Friday, April 5, 2013

Seeking Sole Mates - Lost Sock Holder

This awesome idea is all over the internet right now.  One of the versions I liked best was from the de Jong Dream House.  This is the link to their Seeking Sole Mates Missing Sock Holder.

This is my version:


To make it, I bought a board at Lowes and asked the wonderful people there to cut off a two foot section for me.  Other than that, I just used some acrylic paint I already had (lavender and white), 7 wooden clothespins, tacky glue, duct tape, a ballpoint pen, paintbrush, and some yarn.  The total cost was only about $5 since I had most of the materials already around the house.

First I painted the board lavender (just the front and the edges), and while it was drying I played around with different fonts on my computer.  I just set my page settings to landscape and made sure that the text was large enough to span two pages.  The font I finally settled on was Mona Lisa Solid ITC TT.

After printing the pages, I laid them on top of my board and traced over the letters with a ballpoint pen.  I was writing on the paper (not the board), but by pressing down hard I left an indention on the board that I could fill in with some white paint and a small paintbrush.  I also painted my clothespins white.

I braided the yarn to make it a little chunkier, stretched it across the front of my board, and glued it to the back using tacky glue.  Then I put a piece of duct tape over the string in the back just for good measure (and to make sure the yarn doesn't snag on anything when I hang it on the wall.

The braided yarn has a little more stretch than other materials you could use (like a thin rope, twine, or wire).  So, when I started pinning socks to my board, the clothespins would flip down and the yarn would sag.  I didn't like that, but a dab of tacky glue between each clothespin solved the problem.


Now I just have to decide where to hang it!

Wednesday, April 3, 2013

How To Make a Science Center

I love hands-on science!  This is an "Investigation Station" I put together for a first grade class to use during their center time.  At this particular center, students explore the concept of stability as they build their own towers using (recycled) paper and tape.  The goal is for students to build the tallest tower they can that will stand for 30 seconds without falling.  They can cut, bend, fold, crumple, roll, and tape the paper- but they only have 10 sheets with which to work.  After designing, building, and making adjustments to their tower, students measure the height of their tower with a ruler and record the measurement in their science notebook along with a drawing of the tower.  Students also reflect in their notebooks about what makes a tower stable.


To make this center, I just cut a tri-fold board in half (to make 2 mini tri-folds) and used a yellow marker to make a quick waffle design to decorate the background.  You could also use a solid or simple pattern wrapping paper to wrap the board, as long as the design of the paper didn't distract from your content.  Personally, I just don't like how boards wrapped in paper get all poofed-out and crinkly in the creases.

I typed up my directions and printed them (unlike the stereotypical elementary school teacher who has beautiful handwriting with perfectly formed letters.... I'm better off typing if I expect anyone to understand what I'm trying to say).  Then I drew and printed some simple pictures to help make the activity more comprehensible for struggling readers.  It's so important for children to feel empowered and capable, and science can be a strength for students who might struggle in other areas, like reading.  If my intent is for children to be able to work at a station independently, I want to put in place whatever scaffolds are necessary to ensure that students of varying abilities can be successful.  I also left a book at the station for higher readers who might be interested in reading about famous towers around the world.

So that's it!  Once I had the idea, it only took about an hour to put the board together.  I'm thinking about doing another one, but I might use velcro this time to make it easier to change activities without having to create a whole new board.

Monday, April 1, 2013

How To Make Simple, Beaded Napkin Rings


I have never been a napkin ring kind of person.  I have always preferred to just eat as neatly as I can and use a paper towel (or my jeans) if that doesn't work out.  But, in the process of planning a wedding, I just keep seeing beautiful table settings everywhere!  We go to register, and the lady at the registry counter sets up little table settings to convince us to get pretty dishes.  Then we talk to the event rentals company, and they show us their large selection of table linens.  The more I look at table settings, the more I like napkin rings!  There's just something about them that makes tables look so charming.

So, since I can't resist the opportunity to do crafts (especially if there are beads involved)... I decided to make napkin rings to use at our reception.  They're really pretty simple to make.

Step 1: Gather your materials.

You'll need beads, round nose pliers, heavy-duty wire cutters, and memory wire.  I used 1-3/4 inch bracelet size silver-plated steel memory wire that was 0.5mm thick, and the size/strength of the wire worked perfectly for what I was doing and with a variety of glass, crystal, and stone beads.  If you wanted to use seed beads or pearls (with teeny-tiny holes), you might need a thinner wire- but then you lose rigidity in the finished napkin ring.


Step 2: Cut memory wire into individual loops.

Memory wire comes in a long coil like a slinky.  Using the heavy-duty wire cutters, cut it into individual loops, with about an inch of overlap.  You definitely want to use heavy-duty wire cutters for this, because memory wire is extra tough and will ruin ordinary pliers.


Step 3: Curl one end of the ring.

Use the round nose pliers to grab one end of the wire and curl it up into a little spiral.


Step 4: Add beads.

Decide which colors you want to use and try arranging them in a pattern on the table before you thread them onto your ring.  I like doing ABAC patterns, like the one below.  As you thread the beads onto your wire, the spiral will keep them from sliding off the other end.


Step 5: Complete the ring.

Stick the loose end of the wire through the spiral you made on the other end.  Then use the round nose pliers to curl the other end of the wire into a spiral as well.  You will have two interlocking spirals to hold your ring together.


That's it!  It takes less than an hour to make a set of 8, and the materials are pretty inexpensive.  A one-ounce coil of memory wire has roughly 100 loops and costs about $4.  The beads can be as cheap or as pricey as you want them to be.

I love this project for so many reasons.  First, the memory wire is so easy to work with because it holds its shape (which is fabulous when you're trying to make a perfectly round napkin ring).  Also, my favorite part of doing beaded crafts is choosing colors and coming up with the design- which is how you spend the majority of your time when making napkin rings.  It takes no time at all to put the beads on the ring once you've decided on your pattern.  Finally, the interlocking coils makes it super-easy to finish the ring.  There's nothing worse than spending hours on a long, intricate beaded necklace just to have all the beads slip off because you're struggling to tie a knot at the end or get a teeny-tiny little crimp bead to behave the way it's supposed to.  Wire coils are so much nicer.

112 rings and counting...

Saturday, March 30, 2013

5 Easy Ways to Help Your Child Become a Better Reader


1. Read aloud to your child!

Children of all ages love having adults read to them.  Did you enjoy The Cat in the Hat or maybe Shel Silverstein's poems as a kid?  Your child will too!  Share some of your favorite stories.  This is something that stays with children for the rest of their lives, and research has shown that it is one of the absolute best ways to help children increase their vocabulary, reading comprehension, and ability to read with fluency and expression!

2. Let your child see you reading!

When children see adults reading, it teaches them that reading is important and fun.  We want them to know that reading is not just something taught in school.  When I was younger, I remember my dad would keep a book wedged next to his seat in the car.  He said it was for long stoplights... : )

3. Ask your child to read to you.

This is a great way to bond with your child and show them you are interested in what they do!  Reading aloud will also help your child's fluency and expression.

4. Discuss books with your child.

Choose a book to read together, and talk about it during dinner or before bed.  You could ask your child questions such as:

  • What do you think about that character?  Why?
  • How is he/she feeling?  Have you ever felt that way?
  • Do you agree with what the character did?  Why?  Or, why not?
  • What are you picturing in your head when you read this?
  • What do you think will happen next?

Think about how you discuss your favorite TV shows with a friend, and discuss books the same way with your child.

5. Take your child to the library!

Library cards are a free and powerful thing, and librarians are experts at helping children find books they will love.  See if you can get your child hooked on a great series.  Not only will it help their ability to predict and infer about characters they know so well, but knowing where to find books they love in the library gives them ownership over the process of finding books and helps a big library to feel less overwhelming.