Pages

Friday, March 25, 2016

The Money Answer Book


The other day I finished reading Dave Ramsey's The Money Answer Book from the NC Digital Library.  It was written in a question and answer format, divided into sections based on major topics in personal finance.  It was also pretty direct and to the point, which I appreciated.  I've read some of Dave Ramsey's other books, and sometimes I feel like I get bogged down in the stories.  I understand that they're meant to be motivational, but I like practical tips best.

I've been making budgets Dave-Ramsey-style since before I knew who Dave Ramsey was, and my husband and I are doing pretty well in terms of his baby steps.  Reading through this book though did cause me to put a few more things on my to-do list (which consisted of a series of one-line emails to Steven).  He has some great tips!

2016 Book Count: 7

Wednesday, March 23, 2016

5 Days to a Clutter-Free House


I found this book (5 Days to a Clutter-Free House by Sandra Felton and Marsha Sims) on the North Carolina Digital Library, which is probably my new favorite thing.  All you need is the number off your regular library card and your 4-digit pin number (many libraries  recommend the last four digits of your phone number- so try that if you forgot yours).  The selection isn't amazing, but you can definitely find something to read!

I wasn't too impressed with this book.  I felt like the first half of it could be summarized in about a paragraph, but the second half of the book had a few good tips.

Basically, the authors recommend gathering together a group of people (2 people per room of your house if possible) and focus on clearing surfaces, using body benchmarks.  Day 1 is feet to knees, day 2 is knees to shoulders, day 3 is shoulders to the ceiling, day 4 is reserved for inside cupboards and cabinets, and day 5 is for storage areas like a garage or shed.  As you go through clearing surfaces, everything gets put into those neat little white cardboard storage boxes, labeled with where you found the stuff and where it goes.  For example, a box might be labeled "Papers from coffee table in living room- going to office" or "Shoes from dining room- going to master bedroom."  At the end of each day, you take the boxes to the room in which they ultimately belong and neatly stack them against the wall.  Later, the homeowner, will go through the boxes, either putting each item where it "lives" in the house, putting it in a pile to donate, or putting it in a "maybe" box.. which will have to be sorted through eventually.  When the initial work crew goes through the house, any obvious trash can be discarded, but "likely trash" stuff should be put in a box labeled trash for the homeowner to make ultimate decisions about.  So, obvious trash would be things like gum wrappers and used paper plates.  "Likely trash" might be something like a broken toy.

That's really the meat of the first half of the book, in a nutshell.  Most of the book was meant to be inspirational rather than strictly practical.  The second half of the book gives tips for sorting through those white boxes and keeping your house from getting cluttered again.

2016 Book Count: 6

Monday, March 21, 2016

Hominy Casserole

Ingredients:

2 tbsp butter
1 large onion
1 green bell pepper
15 oz can of white hominy
15 oz can of yellow hominy
about 2 tbsp flour
about 2 cups of milk
1 8 oz block of sharp cheddar cheese, grated
Ritz crackers, most of one sleeve
Spices: garlic powder, onion powder, seasoned salt, black pepper, and a tiny bit of cayenne pepper

Directions:

Melt the butter in a skillet over medium heat, and add your chopped onions and bell peppers.  Stir them around until they're soft and getting brown.


Drain and rinse both cans of hominy, and add it to the skillet.  Cook it until it's nice and hot.


Push your vegetables to one side of the skillet and tilt it so your butter pours away from them into another corner.  Add the flour and stir it around until it starts to brown.


Then add your milk.  Be sure to stir it really well and make sure any little clumps of buttery flour are incorporated.


Add your grated cheese and stir it around until it melts.  It's okay if it's not totally melted though, because you're going to put it in the oven.


Crumble up the Ritz crackers and sprinkle them over the top.


Bake it in a 350 degree oven for about 30 minutes, or until the crackers on top are starting to brown and you can see the sauce bubbling through a little.


It is not the most beautiful casserole ever, but it is so good!  It's really rich and heavy- good for a cold night.


Monday, February 8, 2016

The Book Thief

This past weekend I finished The Book Thief by Markus Zusak.  It is one of the BEST books I've read in years.  It's set in Germany during World War II and follows a German girl (Liesel) whose foster family hides a Jewish man in their basement.  Liesel can barely read at all when she first joins the family, but her foster father teaches her and she comes to love it.  The Book Thief is written in ten sections around ten of the books that impact Liesel's story, and it is narrated by Death.  The characters in this book are endearing and complex, and Zusak's writing style is powerful and even humorous, despite the subject matter.  I would highly, highly recommend it if you haven't read it yet.  I haven't seen the movie, but I can't imagine that it could possibly do this book justice.


2016 Book Count: 5

Friday, February 5, 2016

Do The Work!


Last week I finished the book Do The Work! by Steven Pressfield.  This is a book a friend loaned me a while ago, but I didn't get around to reading it until just last week.  It is a very quick read, entertaining, and definitely motivational.  It was written to coach you through a project, and the author made several points that really resonated with me.  For example, he says to start a project before you're ready and go on a research diet.  Or, in other words, don't spend forever researching an idea and just go for it.  He says that you can research more later, and even spend your evenings researching- but during prime working time you should be working on your project.

This is something that I definitely struggle with.  I am a reader and a planner, and it is easy for me to spend all my time preparing for something rather than actually doing it.  I think my husband and I balance each other pretty well in this regard.  He definitely goes for it when he decides he's going to do something.  Just in the past year or two he has: changed careers, put up a fence, built a front walkway for our house, started two different businesses, sold his car twice to buy another one, started taking classes again...  I could have easily spent a year just planning for one of those things.  With the fence, for instance, I wanted one for a while, but I was busy comparing options (privacy/wood/metal), prices (pay someone else vs. do it myself, prefab fence panels vs. shipping pallets vs. starting with posts and going from there), watching youtube videos of how to put up a fence...  Once I mentioned my idea to Steven, he went to Lowes and Tractor Supply to compare prices, rented a U-Haul to get the supplies back to our house, bought some materials and started digging fence post holes.  Our fence was completely built about two weeks after he began working on it.

In his book Steven Pressfield also writes about how to overcome resistance and how to not get discouraged by the problems that will inevitably arise (because a problem is just a problem, and problems can be solved).  Finally, he says it is important to finish your project.  Resistance is often the strongest once you get close to the end, but once you finish- whether you succeed or fail- at least you've done what you set out to do!  He writes that when his first movie tanked, "That was when I realized I had become a pro.  I had not yet had a success.  But I had had a real failure."  Failing is sometimes "the price for being in the arena and not on the sidelines" (93).

My favorite paragraph in the book, though, is when he quotes Marianne Williamson on page 89:

"Our deepest fear is not that we are inadequate.  Our deepest fear is that we are powerful beyond measure.  It is our light, not our darkness, that most frightens us.  We ask ourselves, Who am I to be brilliant, gorgeous, talented, fabulous?  Actually, who are you not to be?  You are a child of God.  Your playing small does not serve the world.  There is nothing enlightened about shrinking so that other people won't feel insecure around you.  We are all meant to shine, as children do.  We were born to make manifest the glory of God that is within us.  It's not just in some of us; it's in everyone.  And as we let our own light shine, we unconsciously give other people permission to do the same.  As we are liberated from our own fear, our presence automatically liberates others."

2016 Book Count: 4

Wednesday, February 3, 2016

Chicken Enchiladas Blancas

Ingredients:

2 tbsp canola oil, plus a little to grease your baking dish
2 onions
2-3 chicken breasts, cooked and shredded
2 8oz blocks of cheddar cheese (or substitute monterey jack or pepper jack for one of the blocks!)
2 7oz cans green chilis
1 cup sour cream
1 10oz can of green chili enchilada sauce
6 large flour tortillas
Spices: salt, black pepper, garlic powder, chili powder, cayenne pepper, optional- parsley

Directions:

Preheat your oven to 350 degrees.

Heat the canola oil in a pan on medium heat and add your sliced onion.


Cook the onions until they're turning translucent with brown edges.  Add a good shake of salt, black pepper, and garlic powder.


Add your shredded chicken to the pan.  I already had shredded chicken in my freezer, but I'm guessing the amount I used was about the same as 2 chicken breasts.  If you like a lot of meat in your enchiladas, you could go with 3 chicken breasts.


While your shredded chicken is warming up in the pan, grate all of your cheese.  I happened to have one block of sharp white cheddar and a block of milder orange cheddar, so that's what I used.  But, monterey jack or pepper jack with cheddar would be delicious too!


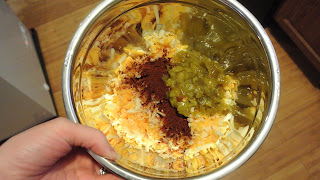
Then, in a mixing bowl, combine about half of your cheese blend, 1 can of green chilis, and a good amount of chili powder.  I rarely measure my spices, but I probably used about 2 teaspoons.


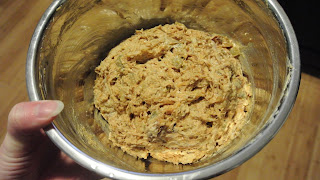
Mix that together, add your chicken and onions, and mix again!


Now add about 1/2 cup of sour cream and stir that in.  This will be the filling for your enchiladas.


Fill your tortillas with the chicken/cheese mixture, roll them up, and put them in a greased baking dish (I just used a little more canola oil to grease mine) with the seam facing the bottom of the pan.  Having the seam face down helps them to not flop open.


In a new mixing bowl (or just use your first one again so you won't have so many dishes to wash!) combine the other half of your cheese blend, the can of green chili enchilada sauce, the other can of green chilis, 1/2 cup of sour cream, and a little sprinkle of cayenne pepper.  Don't go overboard on the cayenne pepper unless you really like a lot of heat!  If you had any of the chicken mixture left after filling your tortillas, you can also add that to your bowl.  This is going to be the creamy sauce for your enchiladas.


Pour the sauce all over your enchiladas, using a spoon or spatula to spread it out evenly across the surface.  Put it in the oven and bake it at 350 for 30 minutes.


When your enchiladas come out of the oven, you can sprinkle a little parsley on top to make them look fancy (optional).


Serve with arroz rojo and refried beans!


Yum!  With sides, this recipe serves 6 very hungry adults, or 12 adults who exercise portion control.  Ours was gone in two days...

Friday, January 29, 2016

Homemade Refried Beans

Ingredients:

2 cans of pinto beans
1 onion
2 tbsp canola oil
4 oz cheddar cheese
Spices: salt, black pepper, garlic powder, cumin

Directions:

Preheat your oven to 350.

Heat the canola oil over medium heat and add a chopped onion and the spices.  I don't measure my spices, but I probably used about a teaspoon of garlic powder and cumin and maybe 1/4 teaspoon of salt and pepper.  Cook the onions and spices until the onions start to get translucent and brown around the edges.


Drain and rinse the pinto beans and add them to the skillet.  Cook until they're heated through.


Mash the pinto beans and onions with a potato masher.


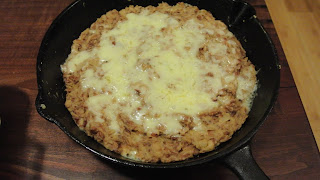
Grate your cheese and stir about half of it into your beans.  Smooth your beans into an even layer in the skillet, and then sprinkle the rest of the cheese on top.


Put the skillet in the oven and cook just until the cheese has melted, or for about ten minutes.


Enjoy!